Honduras Rosewood Burl
Page 2

I decided to go with a cored ebony handle. Black leather is nice but this cue will be a tribute to wood - so ebony, it will be. To further control weight, I'm using a threaded phenolic pin to join both pieces.

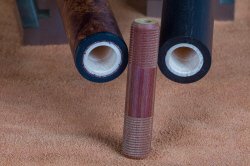
You can see the maple cores have already been threaded for the phenolic pin. The register diameters are also grooved for glue retention. Note that the glue grooves on the cores are easily visible around the periphery of the cores - 4 grooves on the forearm & 3 on the handle. Appropriately, they are completely filled with glue. The combination of close threads and accurate registers will align & secure the components for a solid hitting cue.

The handle has been assembled & I'm ready to install the buttsleeve/mini Hoppe buttcap components.

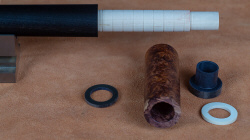
A closer look at the components: a black phenolic ring that helps the transition between the handle & the buttsleeve, the buttsleeve itself (already bored to .877" diameter), the mini Hoppe ring (made of Juma) and finally, the black phenolic buttcap. This arrangement probably looks different to you because I want to maximize the glue surface of the Hoppe style buttcap.

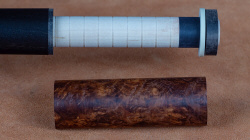
A trial fit of the mini Hoppe style buttcap components shows how the glue surface for these parts is greatly increased compared to simply gluing white & black rings on the end of the cue. The buttsleeve will fit on the tenon between the buttcap and the handle.

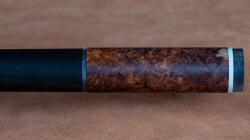
Fit looks good & overall length is good. When this is glued together, cut to size & clearcoated, the phenolic will turn deep black & match the ebony's color perfectly. Then it's time for inlays; probably something small & discrete.
I finally decided on the inlays but forgot to take any pictures until it was too late. However, I did make a short video showing the engraving process. You can see it HERE.
I also made a short video showing the cue with the first coats of clear applied.
You can see it HERE.

And I finally got to meet the Jungle Pixie herself!
7/10/22